Use The Right Tools to Install a Long-Lasting Epoxy Floor
Creating a professional-grade epoxy floor as a DIY project is an ambitious but entirely achievable goal. With the right preparation, tools, and approach, you can transform any concrete space into a durable, functional masterpiece. This article will walk you through the essential steps, from initial preparation to the finishing touches, ensuring you have all the information you need to succeed, of course much more detailed instruction is available on our website and in our comprehensive video guides such as this one: https://youtu.be/JCAvtcpj3gk?si=8xCk6WAVTbUZsQG2
Preparation: The Foundation of Your Project
Understanding Your Surface: Every successful epoxy floor project begins with a thorough understanding of your concrete surface. Assess the condition of your floor, looking for cracks, chips, or grease stains that could hinder adhesion.
Surface Cleaning: Start with a deep clean of your floor using a high-quality degreaser. This step is crucial for removing oils and other contaminants that can prevent the epoxy from bonding correctly. For stubborn stains, consider using a concrete cleaner specifically designed for heavy-duty jobs.
Moisture Testing: Perform a moisture test to ensure that your concrete isn't too damp for epoxy application. Tape down a plastic sheet and check for condensation after 24 hours. Excessive moisture might require you to address the source before proceeding.
Grinding and Repairing: Use a concrete grinder to smooth the surface and open the pores of the concrete, ensuring better epoxy adhesion. Repair cracks and chips with our Quick Patch concrete filler or epoxy patching compound, creating a smooth, level surface.
Choosing Your Epoxy Kit
Types of Epoxy: There are several types of epoxy kits to choose from, including water-based, metallic epoxy, and 100% solids solid color. Each has its own look and unique installation techniques.
Calculating Coverage: Carefully calculate the square footage of your space to determine how much epoxy you'll need. Most products will provide coverage rates, but always err on the side of caution and purchase a little more than you think you'll need. Contact Epoxy Plus and we can help you put an accurate materials list together.
The Toolbox: Gathering Your Supplies
Safety First: Before you start, ensure you have the proper safety gear, including gloves, goggles, and a respirator mask.
Essential Tools: You'll need a variety of tools for a successful application, including:
- A concrete grinder for surface preparation.
- A high-quality vacuum for dust removal.
- Mixing drills and paddles for preparing the epoxy.
- Paint rollers, squeegees, and brushes for application.
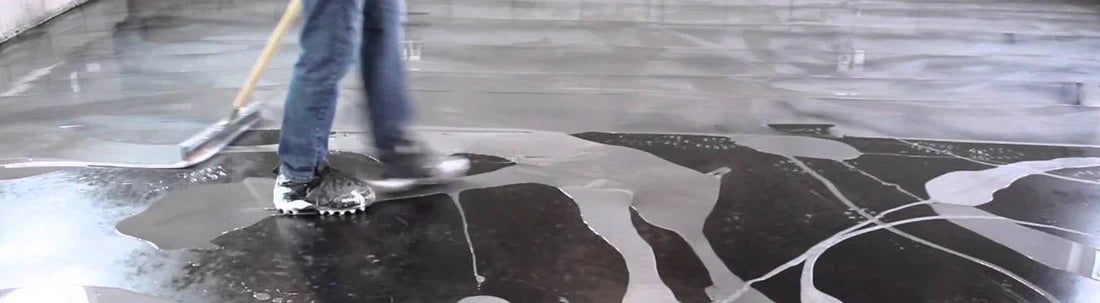
- Spiked shoes for walking over the epoxy as it cures.
Mixing and Applying Your Epoxy
Mixing the Epoxy: Follow the manufacturer's instructions closely when mixing your epoxy. Inaccurate mixing can result in a floor that doesn't set correctly.
The Application Process: Begin by cutting in the edges of your room before using a roller to apply the epoxy to the main area. Work in small sections, maintaining a wet edge to avoid lines and ensure a smooth, even coat.
Adding Flakes and Decorative Touches: If you're adding color flakes, broadcast them onto the wet epoxy immediately after application. This can enhance the look of your floor and provide additional texture.
Curing Time: Epoxy needs time to cure fully. While you might be able to walk on the floor after 24 hours, it's best to wait at least 72 hours before moving furniture back into the space or subjecting the floor to heavy traffic.
Aftercare: Maintaining Your Epoxy Floor
Regular Maintenance: Keep your epoxy floor clean with regular sweeping and mopping with mild detergents. Avoid harsh chemicals that can damage the epoxy finish.
Protecting Your Floor: Use floor mats in high-traffic areas and pads under heavy furniture to prevent scratches and prolong the life of your epoxy floor.
Troubleshooting Common Problems
Bubbles and Fish Eyes: These can occur if the epoxy is mixed too vigorously or applied to a dirty surface. Ensure thorough cleaning and gentle mixing to avoid these issues.
Peeling and Flaking: This often results from poor surface preparation. Make sure the concrete is properly ground, cleaned, and dried before application.
Color Variations: Inconsistent mixing or application can lead to color variations. Mix all your epoxy at once if possible and apply it uniformly to avoid this problem.
Advanced Techniques and Finishes
Metallic Epoxy Floors: For a truly unique finish, consider a metallic epoxy. These require a slightly different application technique but can create stunning, 3D effects on your floor.
High-Gloss Finish: For an extra level of shine, apply a clear topcoat over your colored base coat. This not only enhances the appearance but also adds an extra layer of protection.
Final Thoughts for A DIY Epoxy Installation
Taking on a DIY epoxy flooring project is no small feat, but with careful planning, the right tools, and a bit of patience, it's an incredibly rewarding endeavor. The key to success lies in meticulous preparation and attention to detail throughout the application process. By following the steps outlined in this guide, you'll be well on your way to creating a beautiful, durable epoxy floor that will last for years to come.
Remember, while the process can be straightforward, the devil is in the details. Don't rush through the preparation stages, and make sure to follow the epoxy manufacturer's instructions to the letter. With a bit of effort, your new epoxy floor will not only enhance the beauty of your space but also provide a tough, long-lasting surface that's easy to maintain.
For more tips, tricks, and advice on epoxy flooring, visit us at www.epoxyplus.com. Whether you're a seasoned DIYer or new to the world of epoxy, our blog is packed with resources to help you achieve the best results for your project.